Mechatronics
I did a number of Mechatronics projects over the course of my undergraduate studies at the University of Maryland. Some of them are lost to the historical pre-cloud-storage trash bins, but please enjoy the sampling of work presented below! I plan to add to these as the projects continue.
weather station
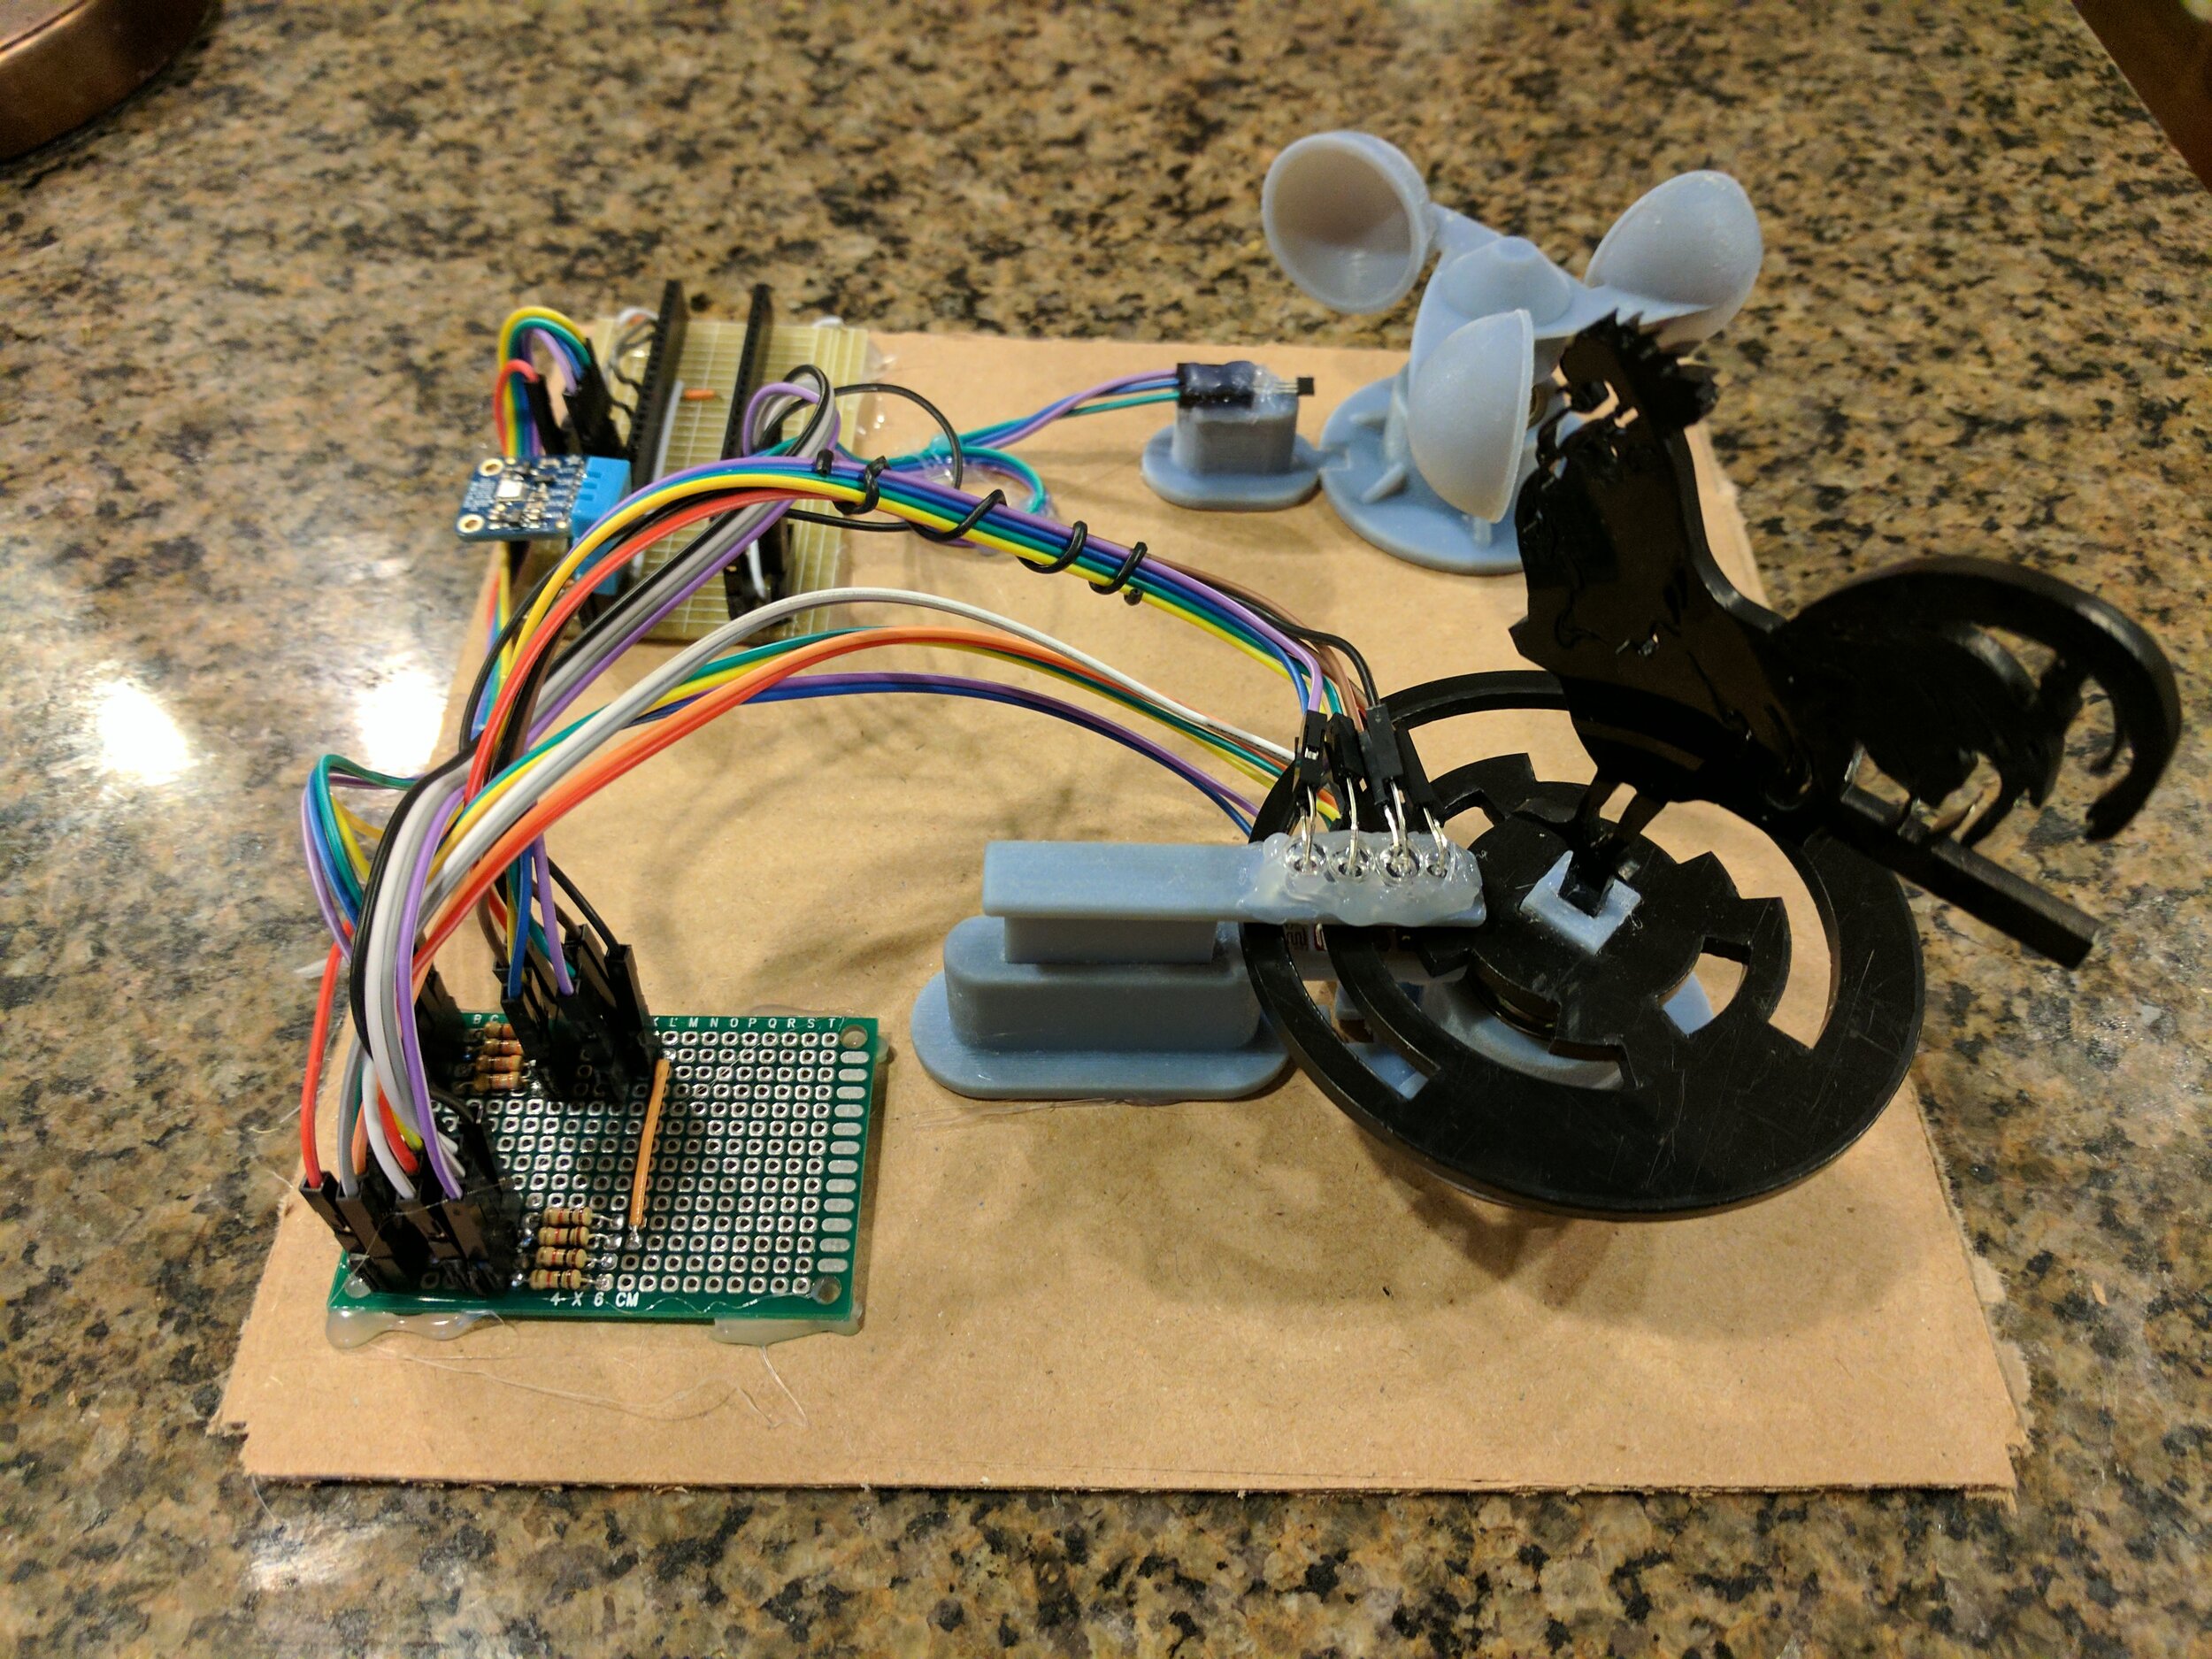
I designed a Raspberry Pi controlled weather station as part of an Internet-of-Things module. The station, pictured below, contained an anemometer, sensors for temperature, pressure, and humidity, and a wind-direction sensor. The data from these sensors was read by the Raspberry Pi and broadcast to a channel on Thingspeak once every 16 seconds to be displayed.
Some details on the sensors:
A BMP180 pressure sensor was used for measuring pressure, and the values were read directly over I2C.
A DHT11 humidity/temperature sensor was used to measure the humidity and temperature, and values were read through the custom library available for this sensor.
A hall effect sensor was used to measure the angular velocity of the 3D printed anemometer via a magnet mounted to one of the vanes.
A 4-bit gray code encoder with a custom LED-photoresistor setup was used to measure wind direction, while a laser-cut rooster functioned as a wind-vane.
This project served as a bit of a first-experience for me for putting together various sensor types and building custom setups to make these sensors functional. You can see this in the messy hot-glue and wiring attempts in the photo, since I wasn’t experienced enough to have overall design be a priority. I got all of the sensors to function, though they certainly could have worked better… The main drawback was the bearings used for the anemometer and the wind-vane; these need to be super low-friction for this size sensor, and the ones I could get weren’t up to that. Getting either one to turn took quite a lot of effort, but they worked to demonstrate the concepts and the sensor functionality.
Mini-Cannon
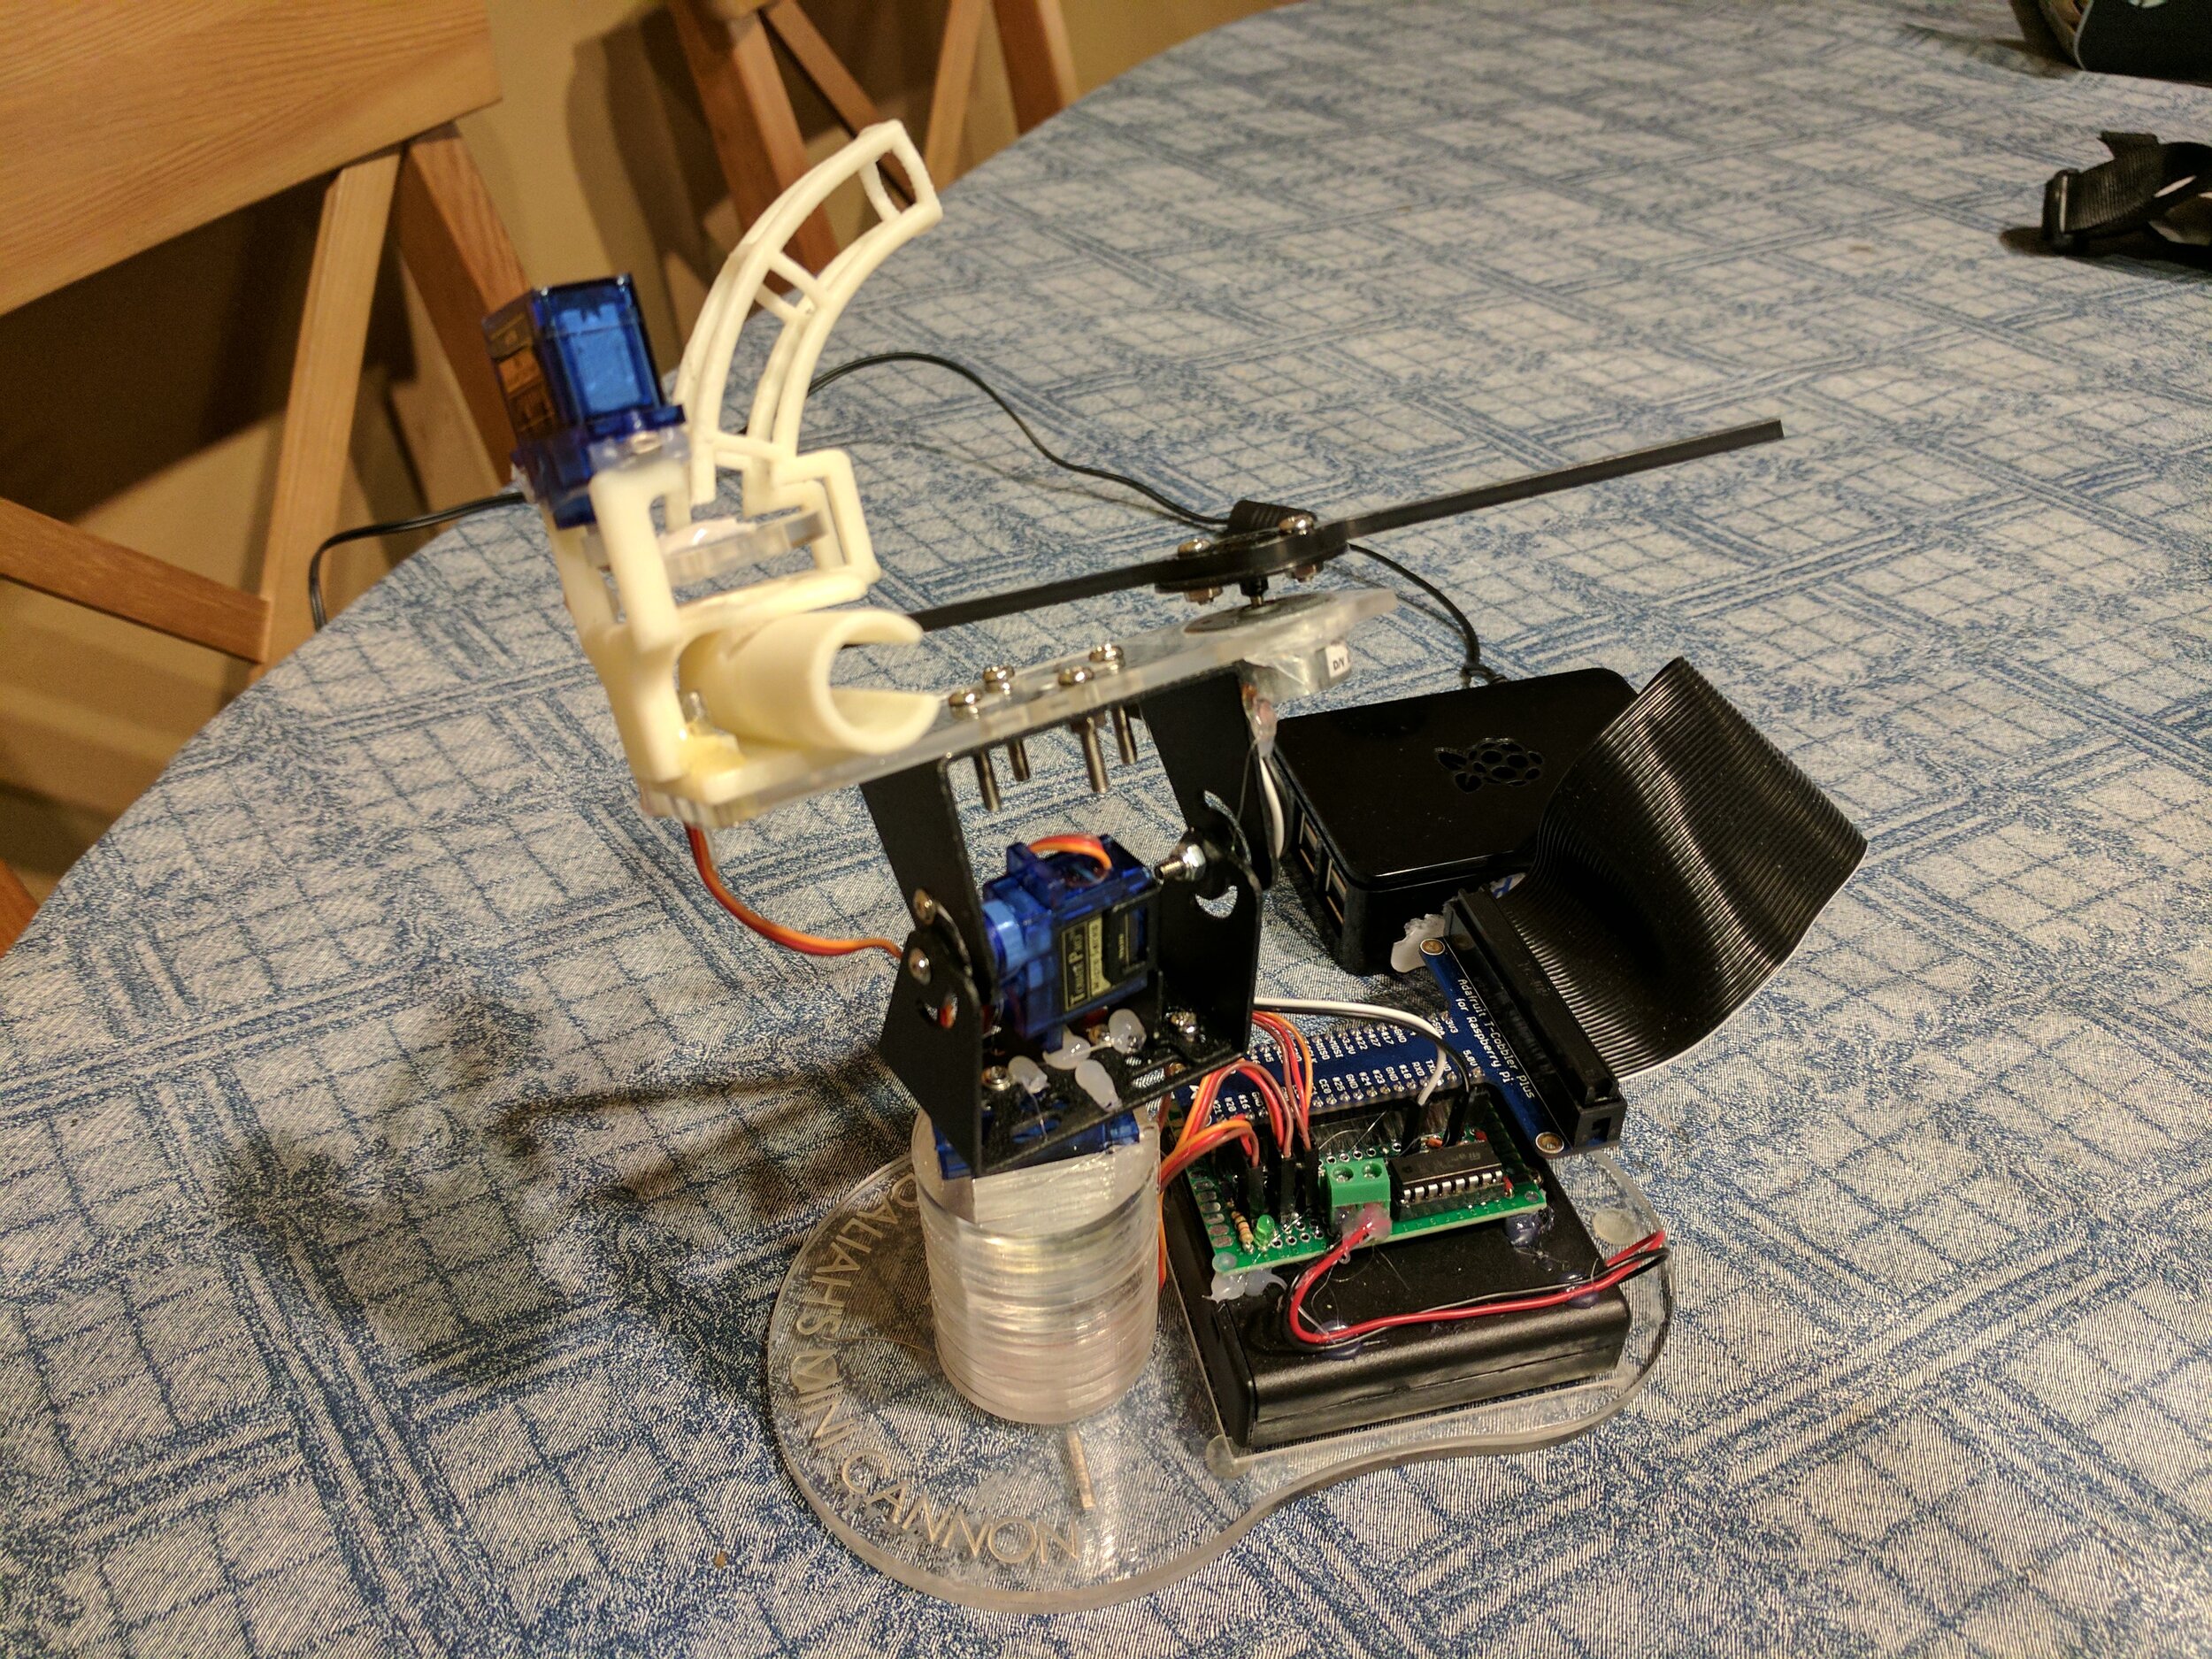
I designed a Raspberry Pi controlled mini-cannon that shot 1/2” plastic pellets using an impact rod. A pan-tilt servo setup allowed the cannon to aim, while a hopper could hold up to five extra shots. An internet accessible interface allowed the cannon to be aimed and fired in a rather rudimentary way.
Some details of the design:
I 3D printed a barrel and hopper for the cannon. An acrylic plate mounted to the loading servo kept the extra pellets raised in the hopper while trapping one pellet for firing. When commanded, the servo would turn the plate and drop the captured pellet into the barrel for firing.
The firing mechanism is an 1/8” ABS impact rod, This would be allowed to spin up to speed before a pellet would be dropped into the barrel, where the impact rod would strike and fire it.
While I was very proud of the design I came up with - especially the hopper and barrel - this cannon suffered from a number of serious issues. The impact rod firing method is not particularly robust, since the rod has very little mass and therefore low inertia. This means that if the first strike on the pellet isn’t clean the rod loses most of its velocity and the second strike is quite weak. Since we had no way of sensing the rod’s position, releasing the pellet into the chamber was a guessing game from this perspective. When the barrel tilted up this issue was seriously magnified, since the pellets tended to strike the edge of the barrel first and stick, resulting in a nearly 100% rate of misfires.
You can see a great example of this in the second video clip, where the pellet jumps up into the hopper rather than out of the barrel. The clip is from an early iteration without the loading plate, which is why the pellet goes up. In the full cannon, the loading plate would block the upward path, so the result would be a low power forward shot on the next go-around of the impact rod. This is what happens in the last video clip.
I’m still proud of the design, but it’s definitely got a redesign in the works. A better firing method that’s less sensitive to timing and orientation issues is definitely a must.
Waldo
A “Waldo” is a teleoperated remote manipulator, where the operator controls one device manually and another device (potentially scaled up) follows the motion. I designed a small Waldo using a Teensy microcontroller to follow the motion of a pan-tilt bracket. The design was based on a laser turret from Star Wars, where the gunner sits in a mobile seat while the guns follow its motion.
The manually manipulated turret uses simple potentiometers wired into the pan-tilt bracket to measure its position. The Teensy then implements a simple proportional controller to follow the motion. Derivative/integral gains weren’t used because low-precision was required in this project, and the (admittedly) poor mechanical design had enough friction to prevent oscillations. But that’s what happens when you only have a week…
Attribution
The weather station and mini-cannon were done as part of ENME489B: Mechatronics and the Internet of Things, taught by Dr. Don DeVoe at the University of Maryland in the Spring of 2017. The Waldo was done as part of MEAM517: Mechatronics, taught by Dr. Mark Yim at the University of Pennsylvania in the Fall of 2017.